Week 5 and 6: Rapid Ideation Session 1 (part 2 and conclusion)
- Will Ward
- Nov 2, 2020
- 5 min read
Following on from my previous blog, I will be explaining the process of making the game demo, what issues I’ve had, what I learned and what I’ll do differently next time.
As mentioned before in a previous blog, my overall goal for the Rapid Ideation sessions was to build a fully working playable game demo, as despite working on plenty of projects in the past I’d never really made something I was totally happy with and have tended to give up part way through.
So, I set myself a high bar for this goal, to really push myself to work within the short timeframe and use this as an opportunity to develop both my coding and pixel art skills – as both have been a bit underused as of late.
As part of my initial creative process I made sure to include a variety of available software and shortlist what would be the best for this task. I’d considered Unity, Unreal and also Godot, but really GameMaker Studio 2 was always going to be my first choice as I’d used it the most recently and am relatively familiar with it.
However, despite being familiar with GameMaker Studio 2, I’m not a coder and would still need to refamiliarize myself with it and would need to use online tutorials to help achieve my goals.
To do this I went straight to the source and used YoYo Games Youtube channel, as I presumed their tutorials would be most up to date. I had also considered using other channels and purchasing Udemy online tutorials but went with YoYo as their tutorials were more succinct and this would be useful given the timeframe.
Having chosen the software and found a variety of useful tutorials, I now needed to go back to planning and clarifying my objectives by more thoroughly listing and mapping out what I’d need to make.
I came up with the following plan:

This plan would help to both visualise what order everything would go in, where things would be placed and allow me to check off what was completed.
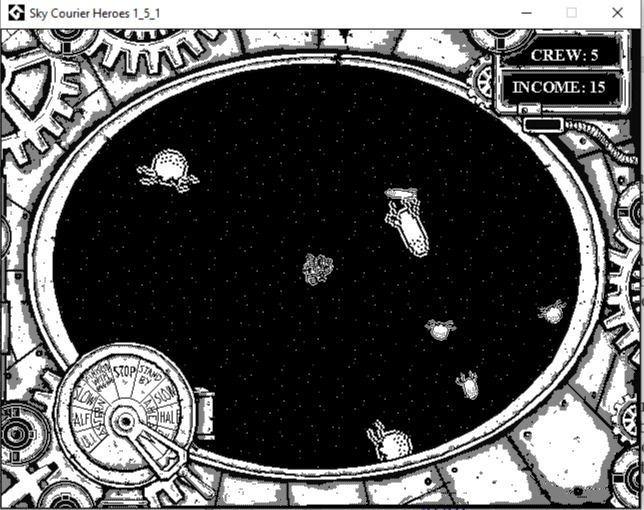
After viewing some of the tutorials, I began making my in game graphics and started with the three main sprites needed. These were the player’s ship, and enemy and a bullet!
I made the player ship and enemies in PiskelApp and used the in-built sprite editor in GameMaker Studio 2 to complete the bullet assets - I would do this on other occasions, for lesser non animated graphics as this helped save time.
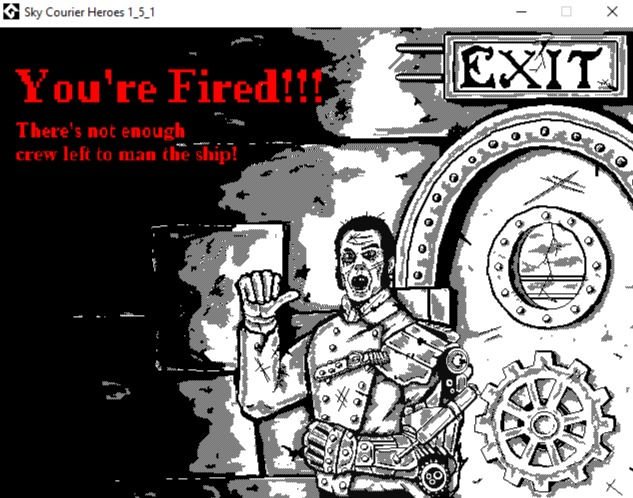
Some of the sprite designs can be seen here:


Once I began adding the sprites to the initial Asteroids tutorial code, I realised that I would need to either resize or redesign them as both the player ship and flying squid (Asteroid) were too small. I went with the resize to save time and felt they looked ok, I would have likely changed them had the quality looked too poor.
As the days went on, I continued to add more code and develop the level design and gameplay – adding my own elements, such as customising how the player ship moved and enemy spawn rates and speed. I also continued to make additional in game images as they were needed – checking them off from my list, which really helped maintain my focus.
Once the demo, was in a good place I decided to take a break from it all for a day or so as part of the “incubation” stage and come back with a fresh set of eyes. This was useful, as it allowed me to assess and make changes to things that I didn’t catch earlier.
I was feeling very positive at this stage, as things were running very smoothly and pretty much ahead of schedule, so I decided to add in some advanced coding to improve the camera and in game space.
It’s here I learned a very important lesson with game development – albeit one I should already know and practice – BACK UP YOUR WORK REGULARLY!!
After following three lengthy tutorials and spending a good three plus hours working on the code, I ran the latest build to find a multitude of errors that broke the game and undid all my progress!
Despite looking through the code and fixing some of the errors, I ended up starting again from scratch as I felt that even if I couldn’t add all of the additional elements I wanted, I would at least have a complete working game/demo – which was my main goal after all. However, a positive to this was that my actual workflow was improved as I retained a fair bit of what I’d learned and was able to do things much quicker – which meant I’d got to a working game much quicker than before and this would give me time try adding improvements again..
This time, however I made sure to make regular build saves so I could easily find a working build if the same errors happened again. Upon further research I found that the advanced tutorials I was using hadn’t been updated to work with the latest version of GameMaker Studio (2.3) and once I’d adjusted things (thanks to some useful YouTube comments) got the advanced camera and parallax backgrounds working properly!
It was at this stage that I decided to stop adding the additional features I wanted, as I was rapidly running out of time and wanted to add audio and upload the current build onto Itch.io and was paranoid that I’d either have another programming mishap or just run out of time.

I spent the last day making audio using online software and playtesting before uploading. I was a little apprehensive of creating my own music, as I’m not remotely musical, but am pretty pleased with the final results for my looping intro music using Beepbox.co and feel like it captures the 8-bit / nautical theme I was going for.
The Download for my game can be found here:
Overall, I really enjoyed the two weeks and was surprised at how much I enjoyed developing something from just an image on a card! Importantly, I feel that I’ve completed what I achieved to do and have found the rapid ideation techniques I’ve used really helpful and don’t think I could have got this far without them. I’m really pleased with my demo and can see myself going back to it and developing it further.
Could things be improved? Of course, and there are a number of things that I will do differently for the next rapid Ideation session:
· Make sure I create version builds and back them up!
· Possibly work in a team and split the different types of development work, so I can concentrate on a specific area and develop the relevant skills more thoroughly.
· Try a different ideation method to what I’ve used before, so I can develop my creative techniques further.

Sources and references:
www.youtube.com. (n.d.). My First Game - Intro to GameMaker - Space Rocks (Part 1) - YouTube. [online] Available at: https://www.youtube.com/watch?v=raGK_j1NVdE&list=PLhIbBGhnxj5JcbfoxS_CWTnImRL_wB_Wg [Accessed 2 Nov. 2020].
Yoyo Games. (n.d.). Learn. [online] Available at: https://www.yoyogames.com/learn [Accessed 2 Nov. 2020].
PiskelApp - www.piskelapp.com
Beepbox - Beepbox.co


Comments